Crochet guide
How to make a temperature blanket: rows, colors and ranges
Updated by Khokhar Sab
Find the coldest and warmest temperatures your area usually gets, and pick a number of colors. Split that spread into equal ranges, and leave the first and last range open-ended. Then choose a row or a square per day: at 0.25 inch per row, 365 rows make a blanket about 91.25 inches long.
What a temperature blanket is
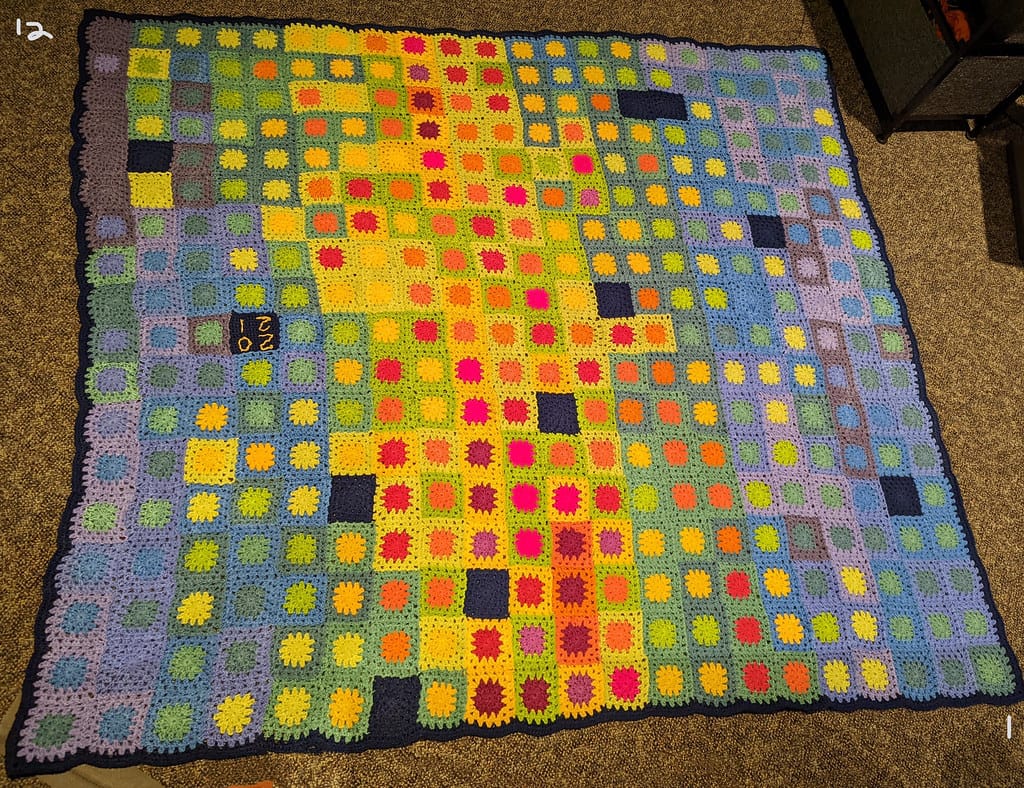
A temperature blanket is knit or crocheted over a whole year, one row or one square per day. The color of each day's row comes from that day's temperature. By December the blanket is a color record of the year's weather, with cool colors where the cold weeks were and warm colors in summer.
The planning happens before you start. You need a format, a temperature range, a set of colors with a range for each, and enough yarn. The temperature blanket planner does the math for each step, and this guide explains what it is doing.
Rows or squares
A row-a-day blanket is the simpler choice. You work one row (or a set number of rows) each day across the full width, so the blanket grows in length all year. It is easy to keep up with, and a few missed days are quick to catch up on.
A square-a-day blanket uses one small square per day, joined at the end or as you go. Squares are portable and you can make them ahead of the join. They also let you show two numbers in one day, such as the low in the center and the high around the outside. The catch is the layout. A year rarely divides evenly into a rectangle, so the last row of squares needs filler squares to finish it off.
With 4 inch squares and 15 squares across, 365 days fill 25 rows of squares. That grid has room for 375 squares, so you need 10 filler squares, and the finished blanket is 60 by 100 inches. The planner works out the filler count for any square size and width.
Find your local high and low
Your range should run from about the coldest day you normally get to about the hottest. Use real records for your area if you can. In the US, NOAA Climate Data Online has daily temperature records for weather stations across the country. Other countries have national weather services that publish past daily temperatures too.
Look at the last few years rather than one, since a single year can be unusually hot or cold. You don't need the all-time record. A range that covers almost every day works better, because the first and last colors also catch anything outside it.
Decide now whether you will use the daily high, the daily low or both, and stick to it. Changing halfway through makes the blanket hard to read.
If you have no data yet, the planner has rough climate presets to start from:
| Climate | Fahrenheit | Celsius (rounded) |
|---|---|---|
| Cold winters | -10 to 95°F | -23 to 35°C |
| Mild / temperate | 15 to 95°F | -9 to 35°C |
| Warm | 35 to 105°F | 2 to 41°C |
| Tropical | 60 to 100°F | 16 to 38°C |
These are starting points only. Replace them with your own numbers once you have looked them up.
How many colors
The planner lets you choose from 4 to 14 colors. More colors mean each one covers fewer degrees, so the blanket shows smaller changes from day to day. Fewer colors are cheaper to buy and easier to keep track of, but long stretches of similar weather will turn into wide bands of one color.
The number of colors also has to fit your range. Each color needs at least one whole degree. A very narrow spread, such as a tropical climate in Celsius, can't hold as many colors as a wide one.
The planner starts with a cool-to-warm ramp of colors, from dark blue through yellow to deep red. You can change any of them to match the yarn you actually buy.
Setting equal ranges
The planner counts every whole degree from your low to your high and divides them into equal ranges, one per color. Two ranges have no hard edge. The first one covers your low and everything colder, and the last covers your high and everything warmer. That way a record cold snap or heat wave still has a color.
Here is the mild/temperate preset, 15°F to 95°F, split into 10 colors. That is 95 − 15 + 1 = 81 whole degrees, or 81 ÷ 10 = 8.1 degrees per color. The planner rounds range edges to whole degrees, so the inner ranges differ in width by one degree at most.
| Color | Temperature range |
|---|---|
| Color 1 | 22°F and below |
| Color 2 | 23 to 30°F |
| Color 3 | 31 to 38°F |
| Color 4 | 39 to 46°F |
| Color 5 | 47 to 55°F |
| Color 6 | 56 to 63°F |
| Color 7 | 64 to 71°F |
| Color 8 | 72 to 79°F |
| Color 9 | 80 to 87°F |
| Color 10 | 88°F and above |
You can also set ranges by hand, for example 10 degrees each. Equal ranges are a good default because every color gets the same share of the scale, though not the same number of days. To see how the colors will spread across the year, count how many days in a past year fall into each range.
Choosing a stitch
Any stitch works, as long as you use the same one all year. The patterns we checked use one of these:
- Moss stitch (also called linen stitch): single crochet and chain 1 worked into the spaces of the row below. Fox & Pine Stitches and Just Be Crafty both use it, and LoveCrafts uses it for its crochet blanket. LoveCrafts starts it on an even number of chains.
- Single crochet: Midwestern Moms makes a plain single crochet blanket, chain 1 and turn on every row.
- Garter stitch for knitters: the LoveCrafts knitted version uses it.
Midwestern Moms points out the catch: the blanket is 365 rows long, so a taller stitch makes a longer blanket. With one row a day, row gauge alone sets the final length. Here is what one row a day for 365 days comes to at the row gauges the designers publish:
| Pattern | Rows per 4 inches | Length for 365 rows |
|---|---|---|
| Fox & Pine Stitches (moss stitch, gauge given in single crochet) | 16 | 91.3 in |
| Just Be Crafty (moss stitch) | 17 | 85.9 in |
| This planner's default row | 16 | 91.3 in |
Before you start, make a swatch in your stitch, count its rows in 4 inches, and run the same sum. Some patterns add rows of their own. Just Be Crafty works two rows of a main color after each month, which adds 24 rows, or 6 inches at 0.25 inch per row.
Finished size
For a row-a-day blanket the length is simple: number of days times the height of one day's work. Measure a few rows of your swatch and divide to get the height of one. A 365-day year at 0.25 inch per day gives 365 × 0.25 = 91.25 inches. In a leap year such as 2028 there are 366 days, which makes 91.5 inches.
That is long for a 50 inch wide blanket. If you want something closer to a bed or throw size, check the blanket size chart and work backward: target length ÷ days = height per day. Some people work two rows per day, one for the high and one for the low, which doubles the length unless the rows are shorter.
For squares, the width is squares across times the square size, and the length is rows of squares times the square size, as in the example above.
Estimating yarn
The planner estimates yarn from a swatch. Make a swatch in your stitch, measure it, and note how many yards it used. That gives yarn per square inch. Multiply by the blanket's area and add a margin.
With the planner's default swatch, 4 by 4 inches using 15 yards, that is 15 ÷ 16 = 0.9375 yards per square inch. The row blanket above covers 50 × 91.25 = 4,562.5 square inches. Multiplied out and with 15 percent extra, it comes to about 4,919 yards, or 25 skeins of 200 yards. The square version needs about 6,297 yards for the 365 day squares, with filler squares on top of that.
Split evenly, that is about 492 yards per color, but real use won't be even. Buy a skein or two of every color to start, then top up the colors your weather uses most. For more on swatch-based estimates, see how much yarn you need for a blanket and the yarn weight chart.
Starting late, past years and special dates
You don't have to start on January 1. Fox & Pine Stitches started in mid January and went back to fill in the days already passed. Lullaby Lodge suggests starting on any day and carrying on for 365 days.
A blanket can also record a past year, such as a birth year, an anniversary or a first year of marriage. Just Be Crafty suggests this as a gift, and Fox & Pine Stitches mentions a baby's first year or a first year of marriage. You need daily records for that year, so check that a weather site has them before you buy yarn. Both designers use Weather Underground for past temperatures.
To mark a special day inside the year, Just Be Crafty works a few stitches of that day's row in an extra contrast color.
Ends and border
A row-a-day blanket can mean a color change on any row, and every change leaves two tails. Fox & Pine Stitches and Just Be Crafty both say to weave in ends as you go, or crochet over them, rather than leave them all to the end. Fox & Pine wove in its ends after each month.
Both patterns finish with a single crochet border, working 3 stitches into each corner. Add yarn for it: the blanket yarn calculator has a border setting.
Tracking day by day
Keep a written record of each day's temperature and color. It saves guessing if you fall behind, and it lets you check your work if a row looks wrong later.
- The planner makes a printable tracker PDF for the whole year, with your colors and ranges, so you can fill in each day as it happens.
- It also shows which color today's temperature falls in, once you enter it.
- If you miss days, look them up in the same records you used for your range and catch up in a batch.
- Write down the dye lot of each color. If you buy more later, a new lot may look slightly different.
Settle your rules before the first day: high or low, how you round half degrees, and which location you use on days you travel. The temperature blanket planner keeps the ranges, size, yarn and tracker together in one place.
Sources
Fox & Pine Stitches' temperature blanket pattern (moss stitch, gauge, catching up, border). Just Be Crafty's beginner temperature blanket (past years, special dates, month rows, ends). LoveCrafts on making a temperature blanket (linen stitch, garter stitch). Midwestern Moms' single crochet temperature blanket (stitch height and length). Lullaby Lodge's temperature blanket guide (starting any day).
Video tutorial
"How to Crochet a Temperature Blanket [And Why You Actually Should Make One]" by TL Yarn Crafts, on YouTube. The video loads only when you press play.